")
Making your own teddy bear can be an incredibly rewarding and personal project. Whether you want to create a unique gift or a custom companion for yourself, crafting a DIY teddy bear allows you to infuse your own creativity and personality into the process. Here’s a step-by-step guide on how to make your own cuddly teddy bear from scratch.
🧸 DIY Teddy Bears: How to Make Your Own Cuddly Companion
What You’ll Need:
- Fabric: Soft, plush fabrics work best, like fleece, minky, velour, or cotton flannel. Choose a fabric that suits the texture you want for your bear.
- Stuffing: Polyester stuffing or cotton batting is ideal for giving your bear that huggable softness.
- Needle and Thread: Strong hand-sewing thread in a neutral color (usually matching the bear’s fur color).
- Scissors: For cutting fabric pieces.
- Sewing Machine (optional): For faster sewing, though hand-sewing works just fine.
- Safety Eyes: If you want to make your bear’s eyes stand out, you can use safety eyes or felt circles. For younger children, use embroidered eyes for safety.
- Embroidery Floss: For nose stitching and any additional detailing (e.g., mouth, stitching).
- Bear Pattern: You can find a free or paid teddy bear pattern online or create your own (usually includes templates for the head, body, arms, and legs).
🧵 Step-by-Step Guide: How to Make Your Own Teddy Bear
Step 1: Choose and Prepare Your Fabric
- Start by choosing a soft fabric for your bear. Plush fleece or cotton flannel are great options that provide a cozy and cuddly feel.
- Wash the fabric before starting to avoid shrinking after the bear is made.
- Cut your fabric into the pattern pieces, which generally include:
- Head (front and back)
- Body (front and back)
- Arms (2 pieces)
- Legs (2 pieces)
- Ears (2 pieces)
Step 2: Sew the Head and Body Together
- Begin by sewing the pieces for the head. Place the front and back head pieces together (right sides facing in) and sew along the edges, leaving the bottom open for stuffing.
- Repeat the process for the body.
- For a smoother finish, clip the seams on the curves of the head and body pieces to help them lay flat once turned inside out.
Step 3: Attach the Ears
- Cut out the ear pieces and fold them in half (right sides together). Sew around the edges, leaving the bottom open to turn them inside out.
- Turn the ears right side out and position them on the top of the head. Pin them in place and hand-sew them onto the head. If you want to make the ears a bit more expressive, you can use a different fabric (like felt) for the inner ear.
Step 4: Stuff the Head and Body
- Now comes the fun part—stuffing! Use polyester stuffing or another soft material to stuff both the head and body. Make sure to stuff them firmly but not too tight, as you want the bear to still be soft and squishy.
- Pay special attention to the neck area to ensure the head is supported and attached securely to the body.
Step 5: Attach the Arms and Legs
- For the arms and legs, sew the pieces together, leaving the top open for stuffing. Once sewn, turn the arms and legs inside out and stuff them with filling.
- Hand-sew or machine sew the open edges of the arms and legs.
- Attach the arms and legs to the body by carefully stitching them in place. For a more professional look, you can sew them in a way that they move slightly (like with joints), but this requires additional materials like disc joints.
Step 6: Embroider the Face
- For the eyes, you can either use safety eyes or embroider them using black thread. To embroider the eyes, simply stitch two small circles for the eyes, making sure they’re evenly spaced.
- For the nose, embroider a small triangle or oval shape with black or brown embroidery floss. You can also stitch a mouth below the nose using simple curved lines.
- You can also add blush or other facial details by lightly using pink fabric paint or blush for a cute, rosy look.
Step 7: Finishing Touches
- After the face is completed, check over the bear to ensure everything is secure. Add any final details, like a bowtie, shirt, or other accessories.
- Stitch on a label or tag if you’re gifting it to someone to make it more personal or official.
Step 8: Name Your Bear!
- Every bear deserves a name, right? Give your creation a special name and it will become even more meaningful. Consider creating a birth certificate or story for your teddy bear for a personal touch.
🧸 Optional Ideas to Customize Your DIY Teddy Bear:
- Add a Soundbox: If you want to add an extra layer of sweetness, consider adding a soundbox that plays a lullaby or a soft voice message when the bear’s chest is pressed.
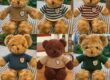
- Make a Matching Outfit: If you’re creating a special teddy bear gift, you can also make matching clothes, like a little dress or a sweater for the bear to wear.
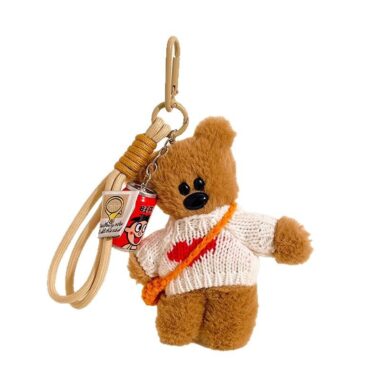
- Add Accessories: You could add cute glasses, a bow tie, or a small handmade scarf for extra personality.
- Personalized Embroidery: Embroider the recipient’s name or a special date on the bear’s paw, back, or chest as a unique keepsake.
🎁 Why DIY Teddy Bears Make Great Gifts:
- Personalized: A DIY teddy bear is something made with love and care, making it a meaningful and sentimental gift.
- Customizable: You can tailor it to the recipient’s favorite colors, outfits, and features.
- Keepsake: Unlike mass-produced teddy bears, a handmade bear holds emotional value and can be kept as a cherished keepsake for years to come.
Making your own teddy bear is a creative and fulfilling project that allows you to express your love and care in a personal way. Whether you’re making it for a loved one, a child, or yourself, the final product will be a soft, cuddly companion with a story of its own. Would you like help finding patterns or materials for this project?
![]()